This page was contributed by a member of the AMP community
Overview
AMP has a well-developed permissions system that allows fine-grained control of what different users can do in AMP.
The permissions given to a particular user are determined by the role (or roles) that user is assigned to.
Users and roles can be created and configured at two levels:
- at the ADS level
- at a particular application instance level
Users and roles created at the ADS level are available to be configured at the ADS level and across all other instances.
Users and roles created at a particular application instance level can only be configured at that level.
Users are managed under the Configuration → User Management submenu, and roles are managed under the Configuration → Role Management submenu. These submenus appear at both the ADS level (main AMP panel showing all instances) and at each individual instance level (AMP panel that is reached by ‘managing’ the instance).
Logically, the types of permissions available to be configured depend on the level being configured.
At the ADS level, the permissions cover those things that can be done at that level - for example, creating instances, starting and stopping instances, upgrading instances, and so on.
At a particular application instance level, the permissions relate to the things that can be done at that level. This includes, for example, stopping and starting the application (eg Minecraft), scheduling tasks that affect the application, backing up the application, and so on.
This means that, depending on what a particular user should be able to do, configuration may be required at both the ADS level and the application instance level.
See the example below for an example of giving a user permissions for a particular application instance.
Initial user and role
On installation, AMP creates a user (usually called admin, but it can be called anything desired) that is assigned the role of Super Admins. This user can control everything in AMP, at both the ADS level and each other instance level.
The Super Admins role should not be changed or deleted. Its function is also used by the instance manager itself to manage AMP.
Options for permissions
In the Role Management submenus, you will see a number of expandable lists of particular functions that are available to assign permissions for.
At the right of each function is a slider with three possible settings, as shown in the screenshot below.[1]
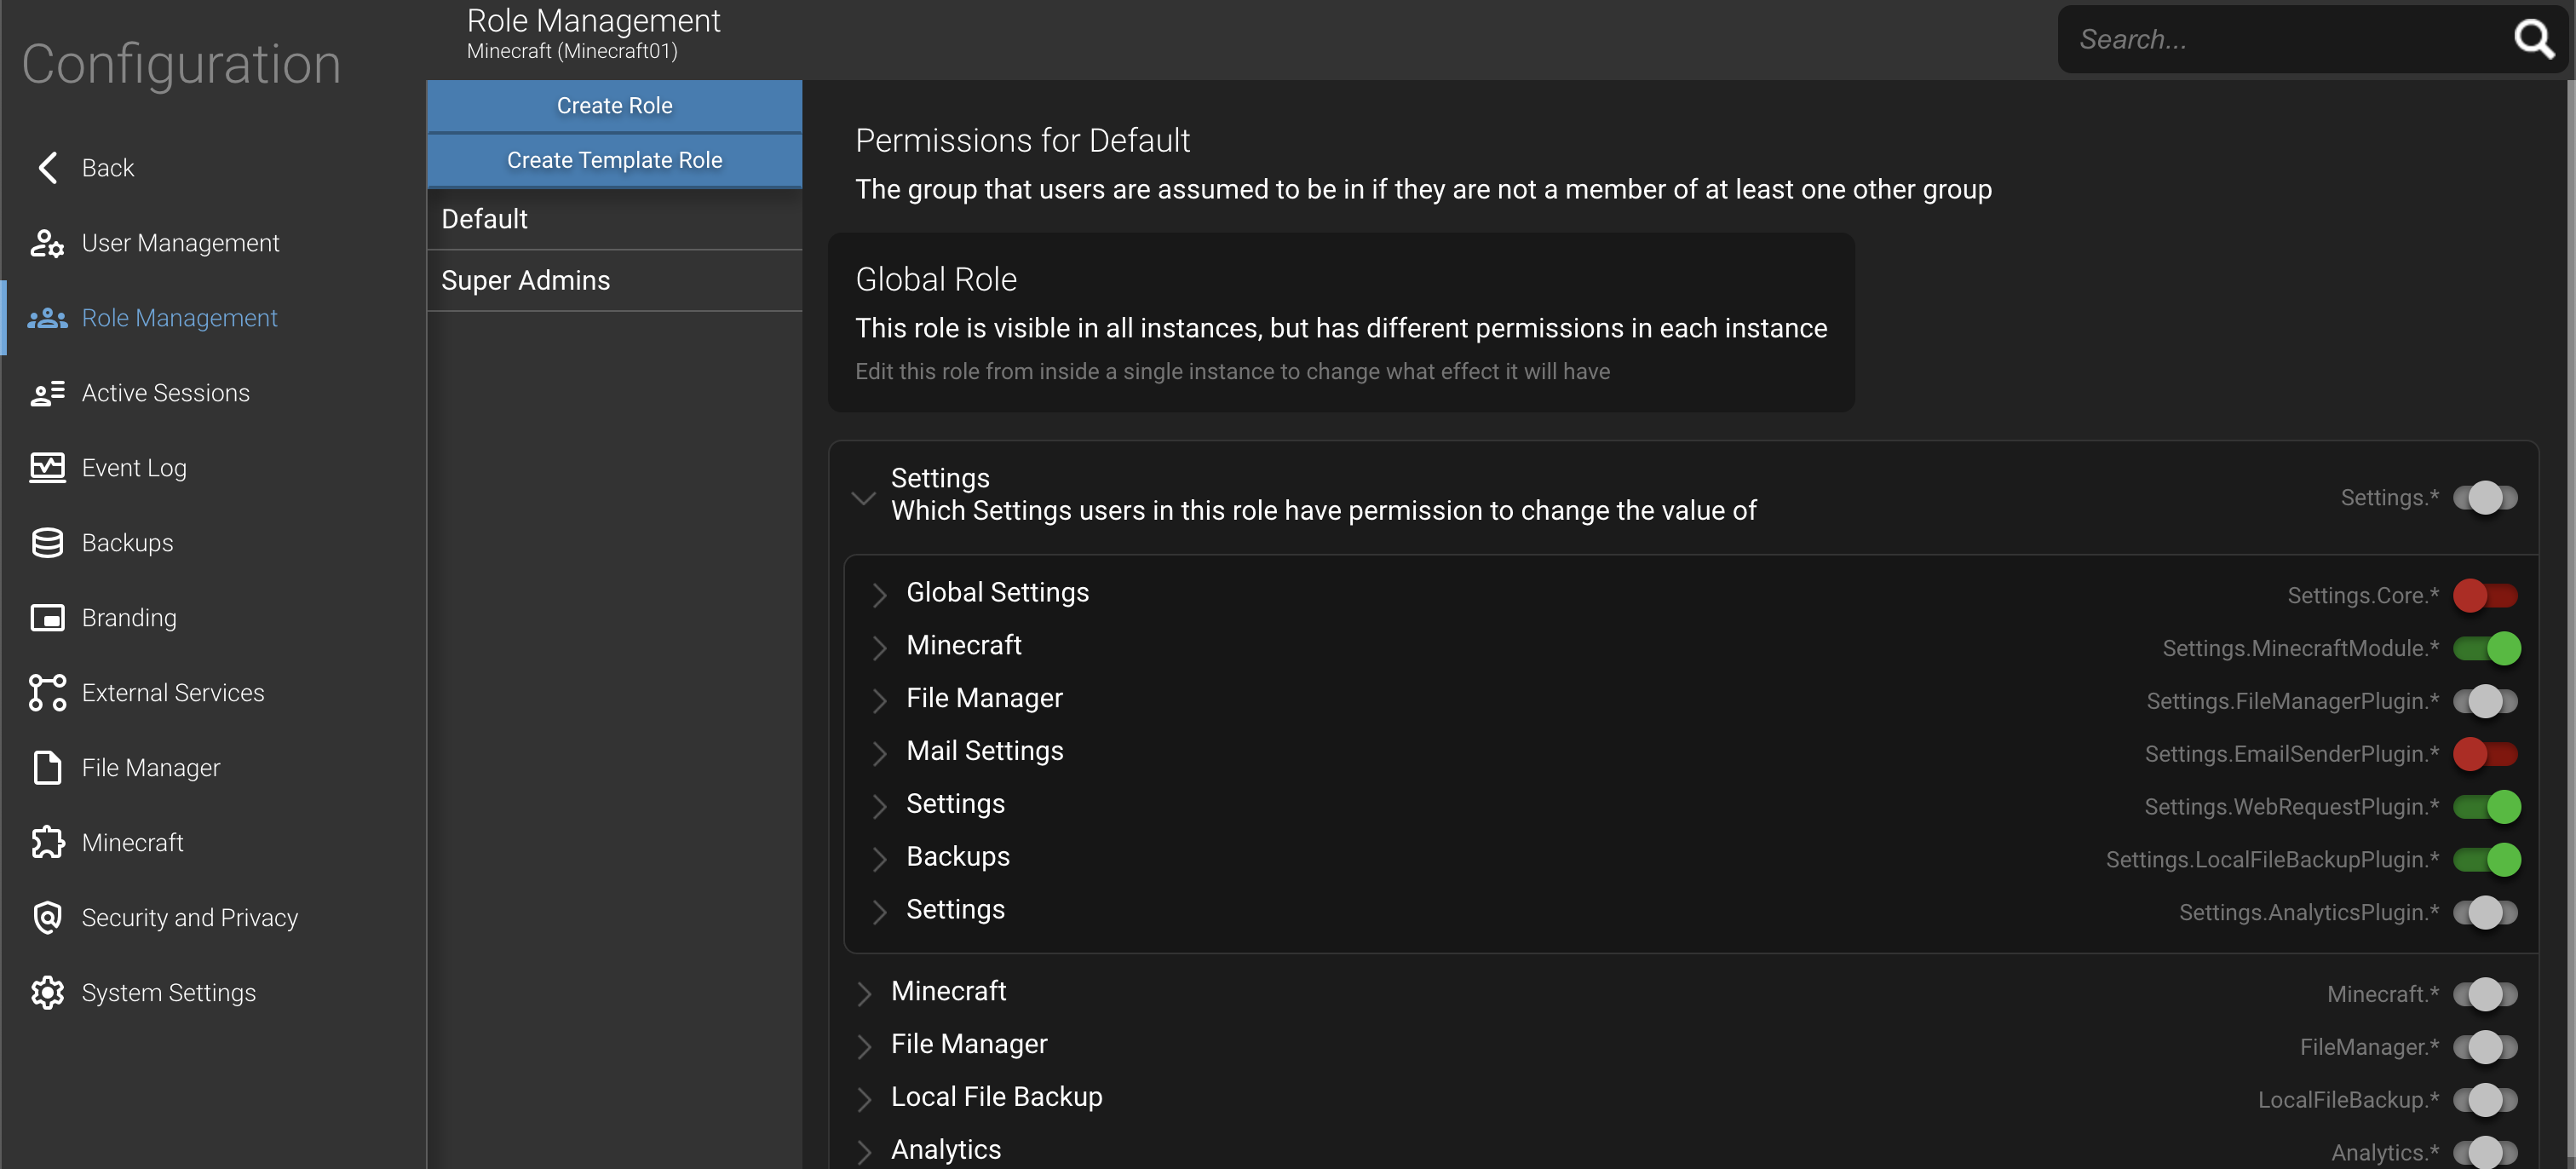
These settings and their meanings are as follows:
-
Red - Permission for the function is expressly denied
-
Grey - Permission for the function is neither expressly denied nor expressly given - the permission won’t be allowed unless it is expressly allowed at another level. For example, a role may have grey settings for File Manager functions at the ADS level, but in a particular application instance is allowed File Manager functions for that instance
-
Green - Permission for the function is expressly given (but can overridden by an express denial at another level)
Toggle between each setting by clicking on the slider.
Example - configure a user to manage an application instance
Say you have created a Minecraft instance and want a particular user to be able to manage some or all aspects of that instance.
You have a two main options:
-
You can create that user and the role for it at the ADS level. This would then allow that user and role to be configured for the Minecraft instance and, if you want, also for other application instances.
-
You can create that user and role only at the Minecraft instance level. This would then allow that user and role only to be used for that Minecraft instance - no other instance.
User created at ADS level
If you create the user at the ADS level, you have a couple of options for how that user logs in to AMP:
Login approach 1 - Login through the main ADS page
This approach could be desired, for example, if the user is intended to manage several instances, or if you want the user to be able to do other things at the ADS level (such as upgrade or restart instances).
-
At the ADS level, at a minimum you need to allow the role to ‘manage’ both the ADS instance and the Minecraft instance - you can find these under the All Instances list.
-
Then, at the Minecraft instance level, give the role the other desired permissions. Do this by ‘managing’ the Minecraft instance as an admin, and then setting the role permissions in the Configuration menu that appears in that instance’s web panel.
The user will then be able to log in through the main ADS page and manage the Minecraft instance from there.
You also have the two options immediately below (discussed under Login approach 2 to allow them to log into the instance directly (ie provide them a specific URL for the Minecraft instance or rebind the instance).
Login approach 2 - Login directly to the Minecraft instance
Under this approach, you just need to give the role permissions at the Minecraft instance level. Do this by ‘managing’ the Minecraft instance as an admin, and then setting the role permissions in the Configuration menu that appears in that instance’s web panel.
Then, to allow the user to log in, you have two options. The easiest option is to provide the user with a specific URL for that instance. You can get this URL by clicking on on the icon showing an arrow pointing up and to the right on the instance.[2] You will see in the new tab’s browser bar the URL for your AMP installation, followed by /remote/xxxxxxx (with xxxxxxx being a sequence of numbers and letters).[3] This is the URL for the Minecraft instance. The user can use that URL to log in.
The other option is to rebind the Minecraft instance from 127.0.0.1 to 0.0.0.0, using the command ampinstmgr rebind. This will allow the instance to be reached on the IP of the machine running AMP and the specific port of the Minecraft instance (eg 8081).
User created at application instance level
If you create the user at the Minecraft instance level, you need to set the role permissions at that level. Then you have the two options immediately above (discussed under Login approach 2 to allow them to log in (ie provide them a specific URL for the Minecraft instance or rebind the instance).